Choose your device to get started
Install and Activate eSIM on iPhone
Before eSIM installation and activation
1. Ensure your device is eSIM-compatible and carrier-unlocked. Check out if your iPhone supports eSIM.
2. You must have the QR Code on another screen or device or a printed paper to scan it with your phone camera.
3. Ensure that your internet connection remains stable throughout the entire process
4. The QR code or manual installation can only be scanned ONCE.
5. DO NOT remove the eSIM from your device because it cannot be used again.
Installation with QR code
Check your email
Open your email and find the email we sent you with the QR code. If you have not received your code, contact us.
Scan the QR code
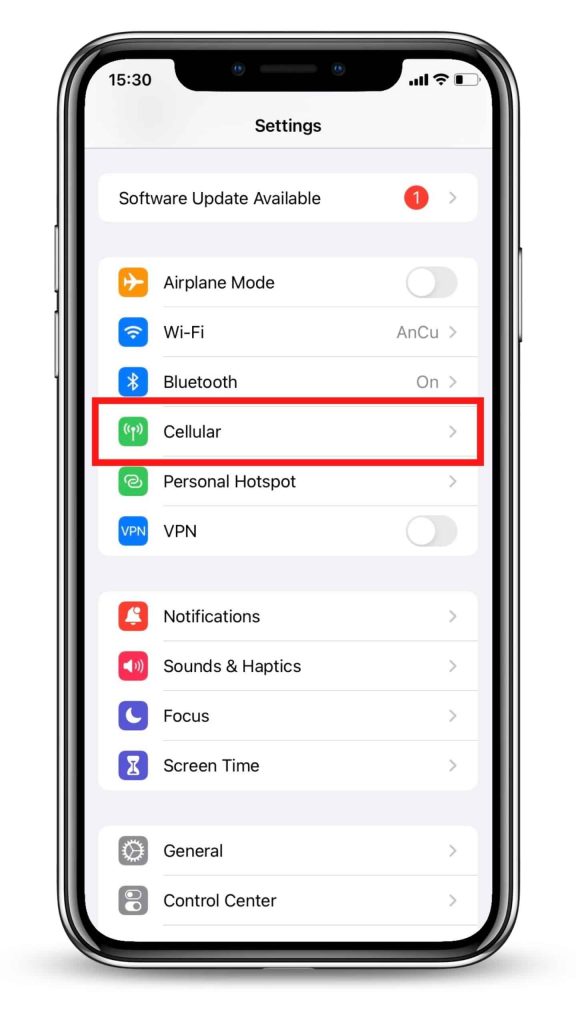
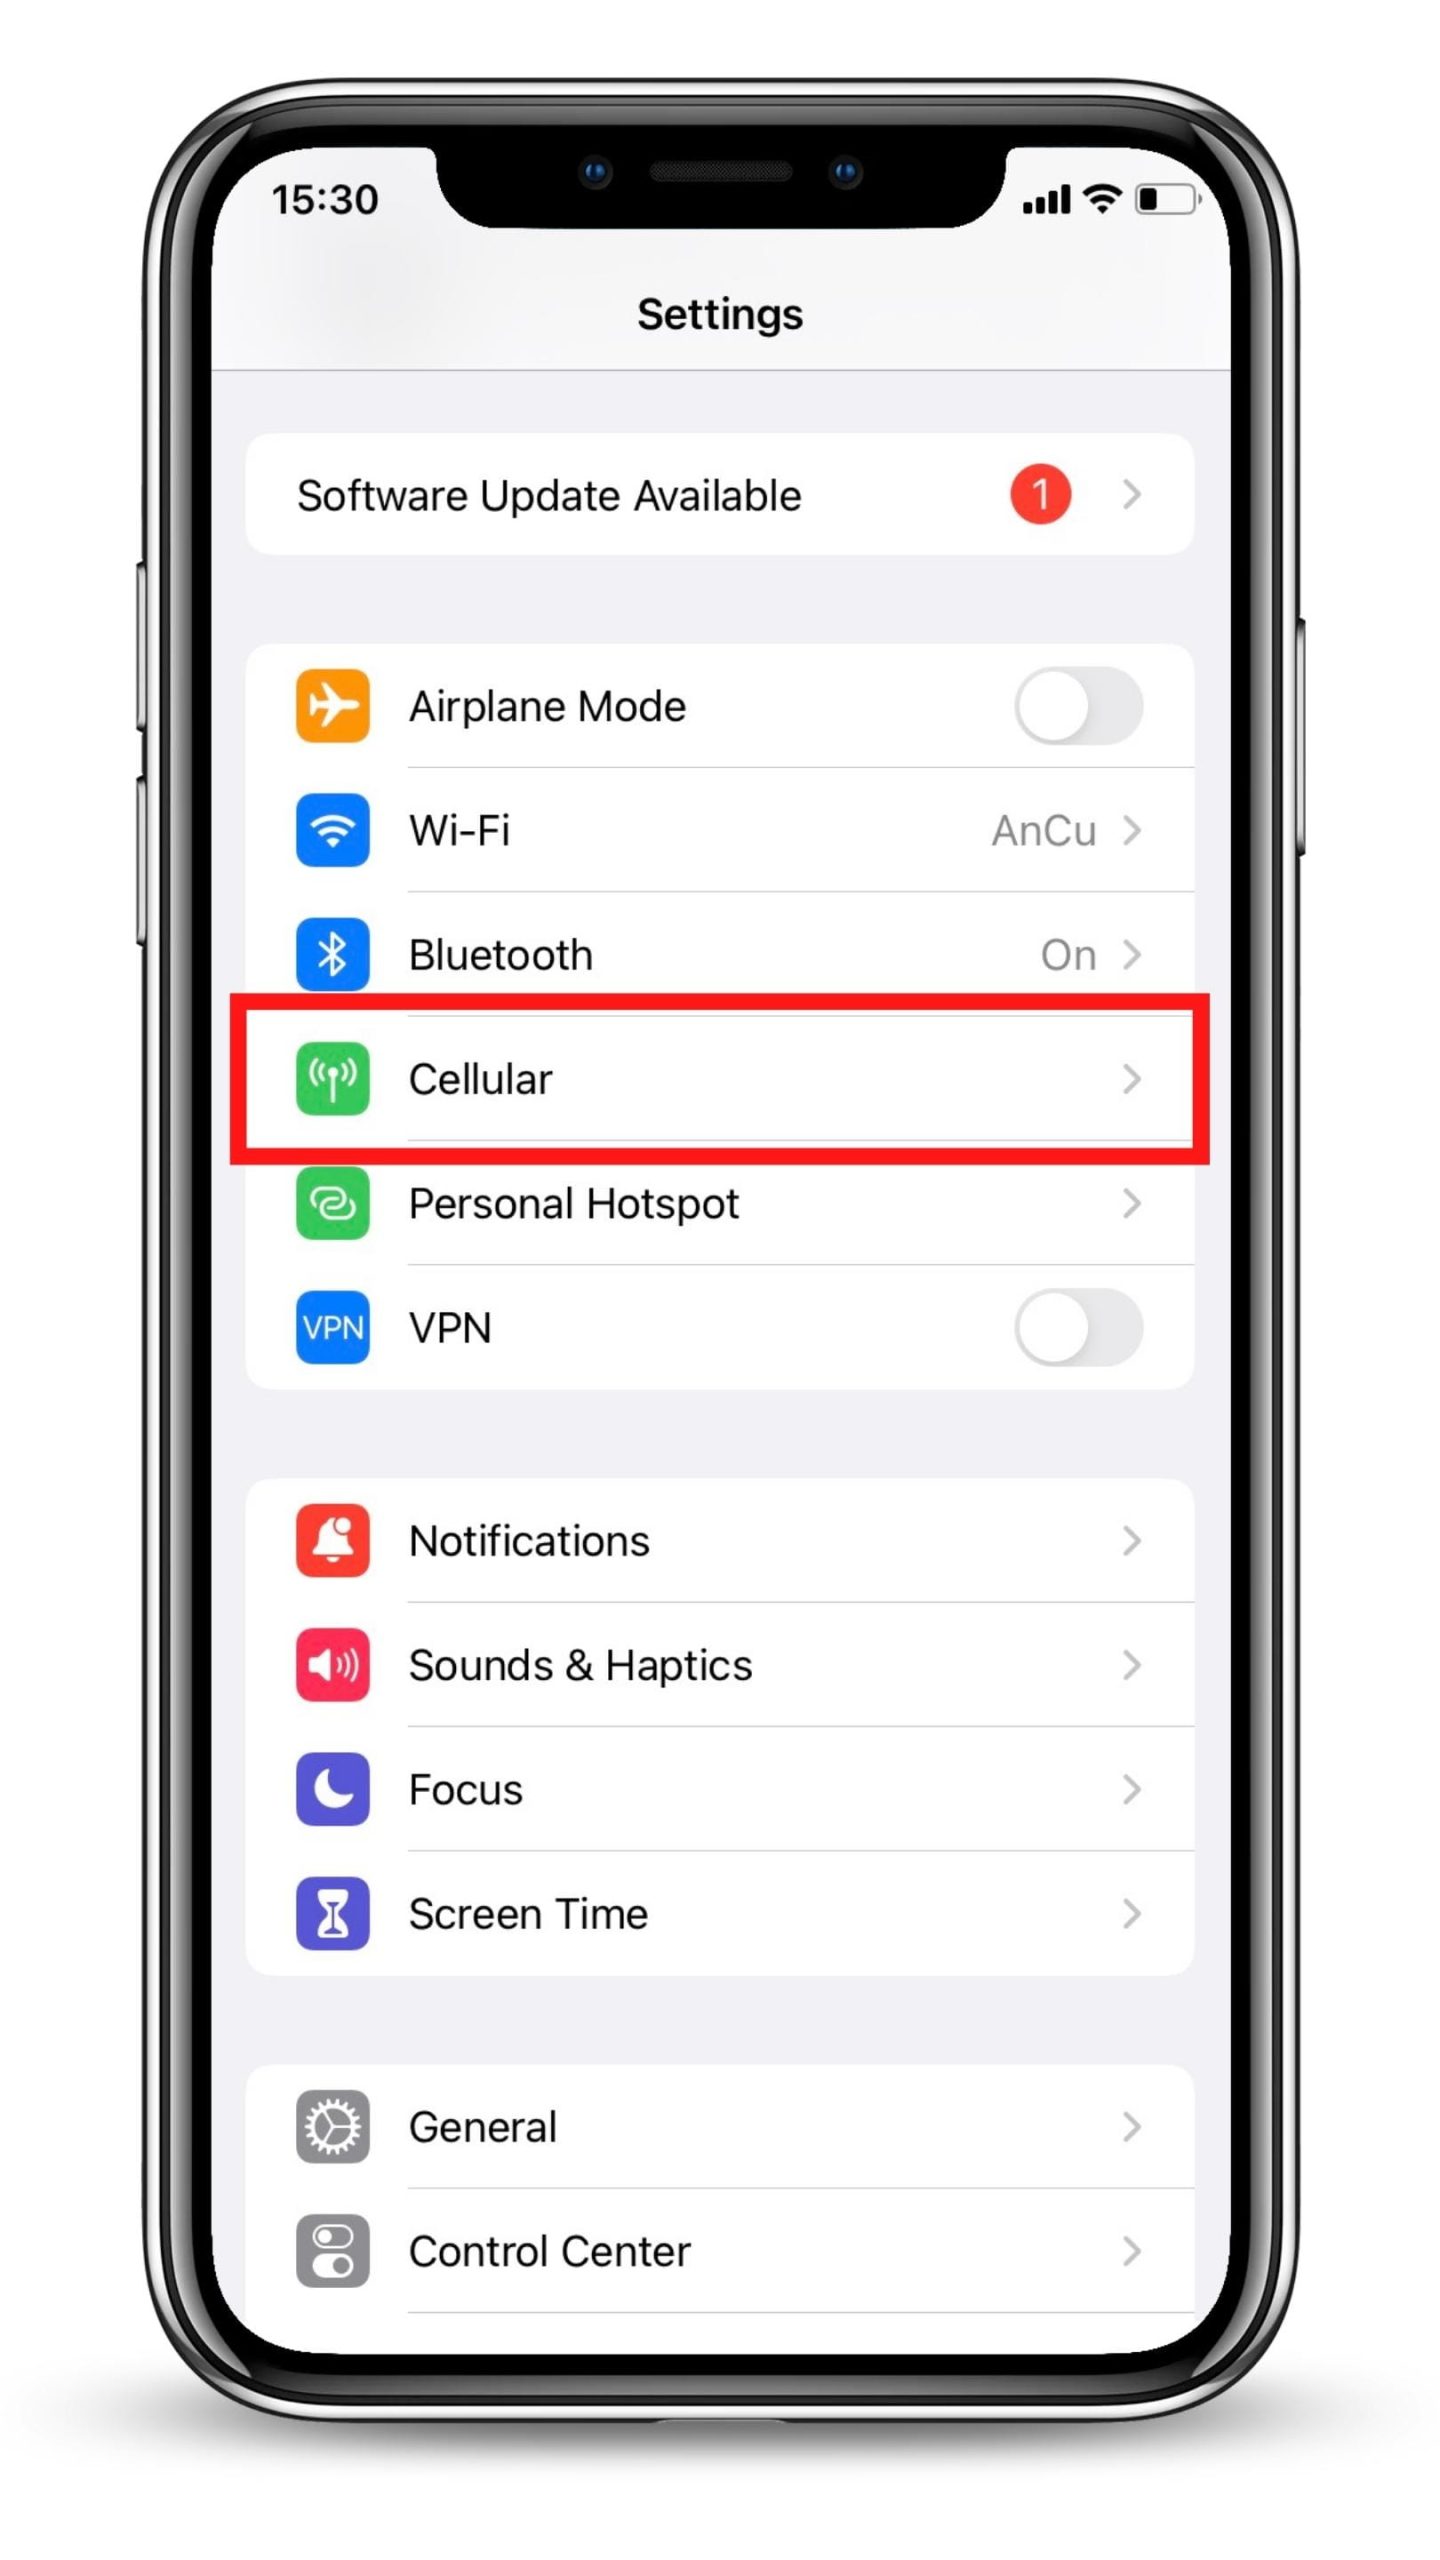
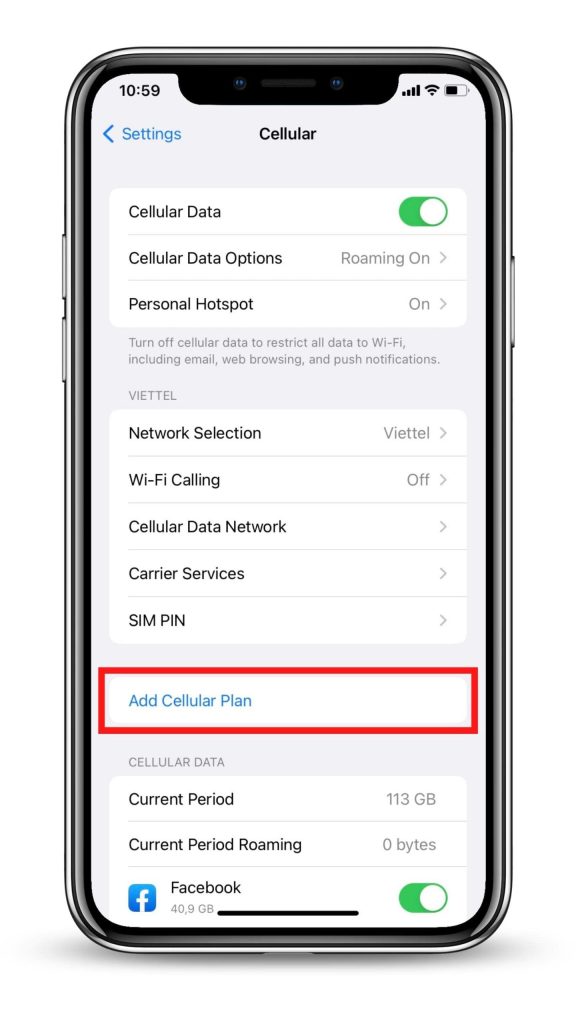
Open your camera and scan the code, or navigate to “Settings” > “Mobile Data” > “Add Data Plan” to scan the code from there.
Follow installation steps
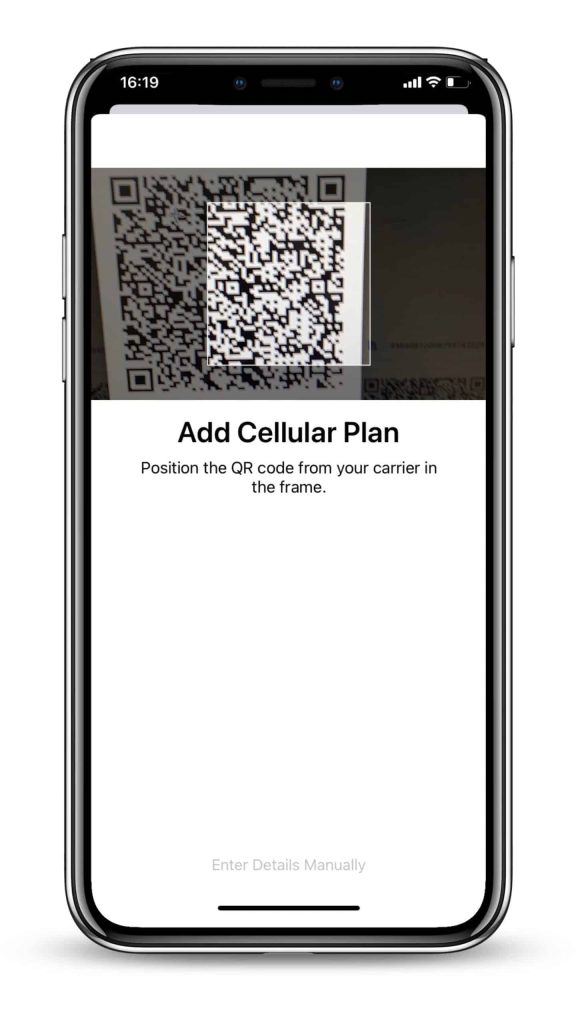
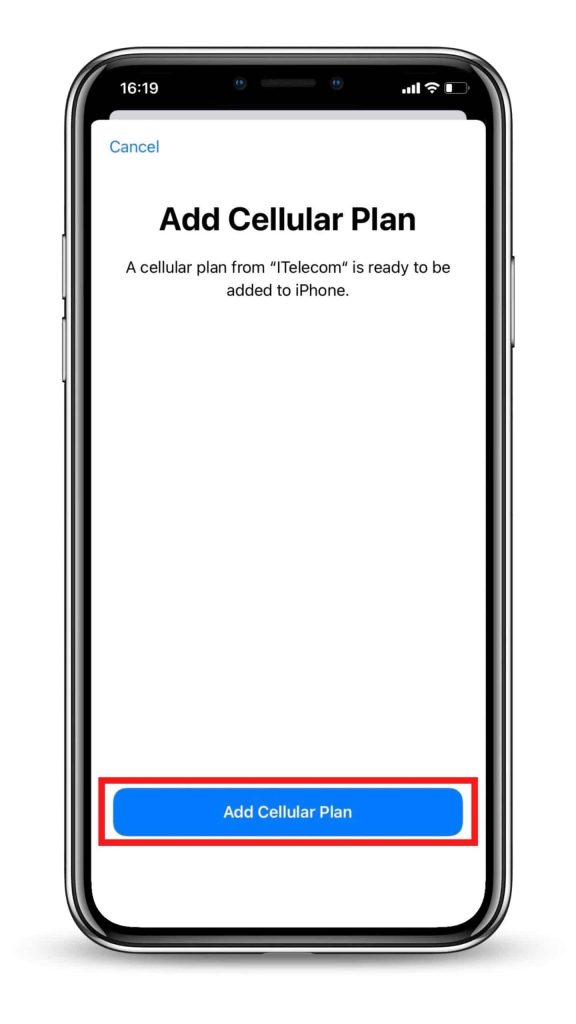
Scan the QR code to start the installation process. Use our guide below for step-by-step configuration.
Steps to install and activate eSIM
- Étape 1: Sur votre appareil iOS, accédez à Paramètres > Cellulaire.
- Étape 2: Sélectionnez Ajouter des données/Forfait cellulaire/Ajouter eSIM.
- Étape 3: Scannez le code QR eSIM que vous avez reçu.
- Étape 4: Choisissez le bouton Ajouter un forfait cellulaire pour enregistrer les détails de l’eSIM.
- Étape 5: Sur l’écran intitulé Cellulaire/Données mobiles Plan Labels, sélectionnez le label disponible (comme Secondaire, Affaires, Voyage,… ) ou Labelisez votre profil eSIM comme vous le souhaitez (c-à-d. eSIM Chine), et touchez Continuer.
- Étape 6: Définissez votre profil eSIM comme ligne par défaut (si votre eSIM de données est accompagnée d’un numéro de téléphone) ou sélectionnez votre numéro principal si votre eSIM de données n’est pas accompagnée d’un numéro de téléphone), puis choisissez Continuer.
- Étape 7: Définissez votre profil eSIM comme Données cellulaires par défaut > choisissez Terminé.
- Étape 8: Activez l’itinérance des données pour commencer à utiliser votre eSIM. (Nous vous recommandons de le faire une fois arrivé à destination).
* Notes: Detailed guides for each eSIM plan will be sent in the email after purchasing.
Install manually
Check your email
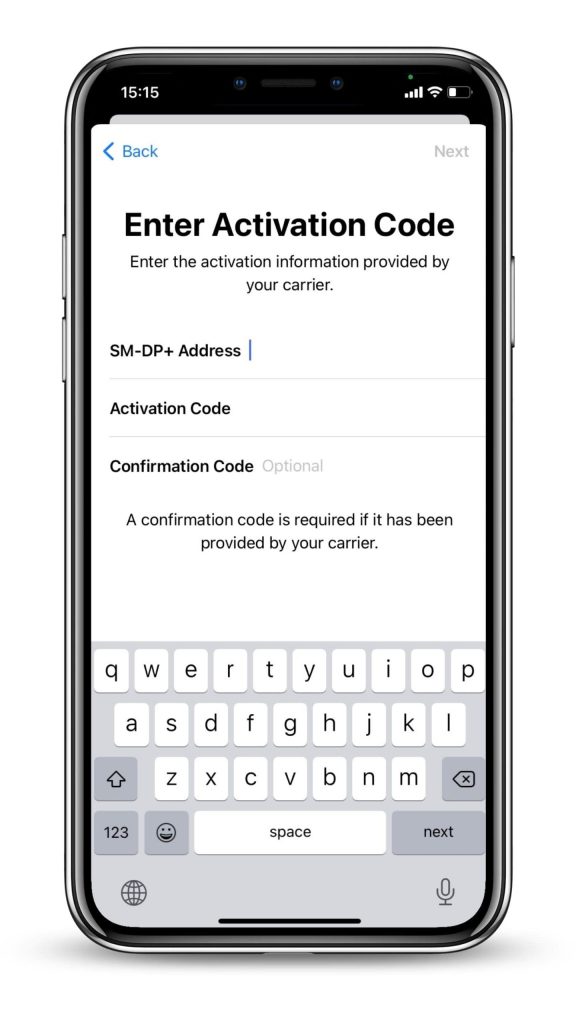
Open your email and find the email we sent you with the SM-DP+ address and activation code. If you have not received your code, contact us.
Scan the QR code
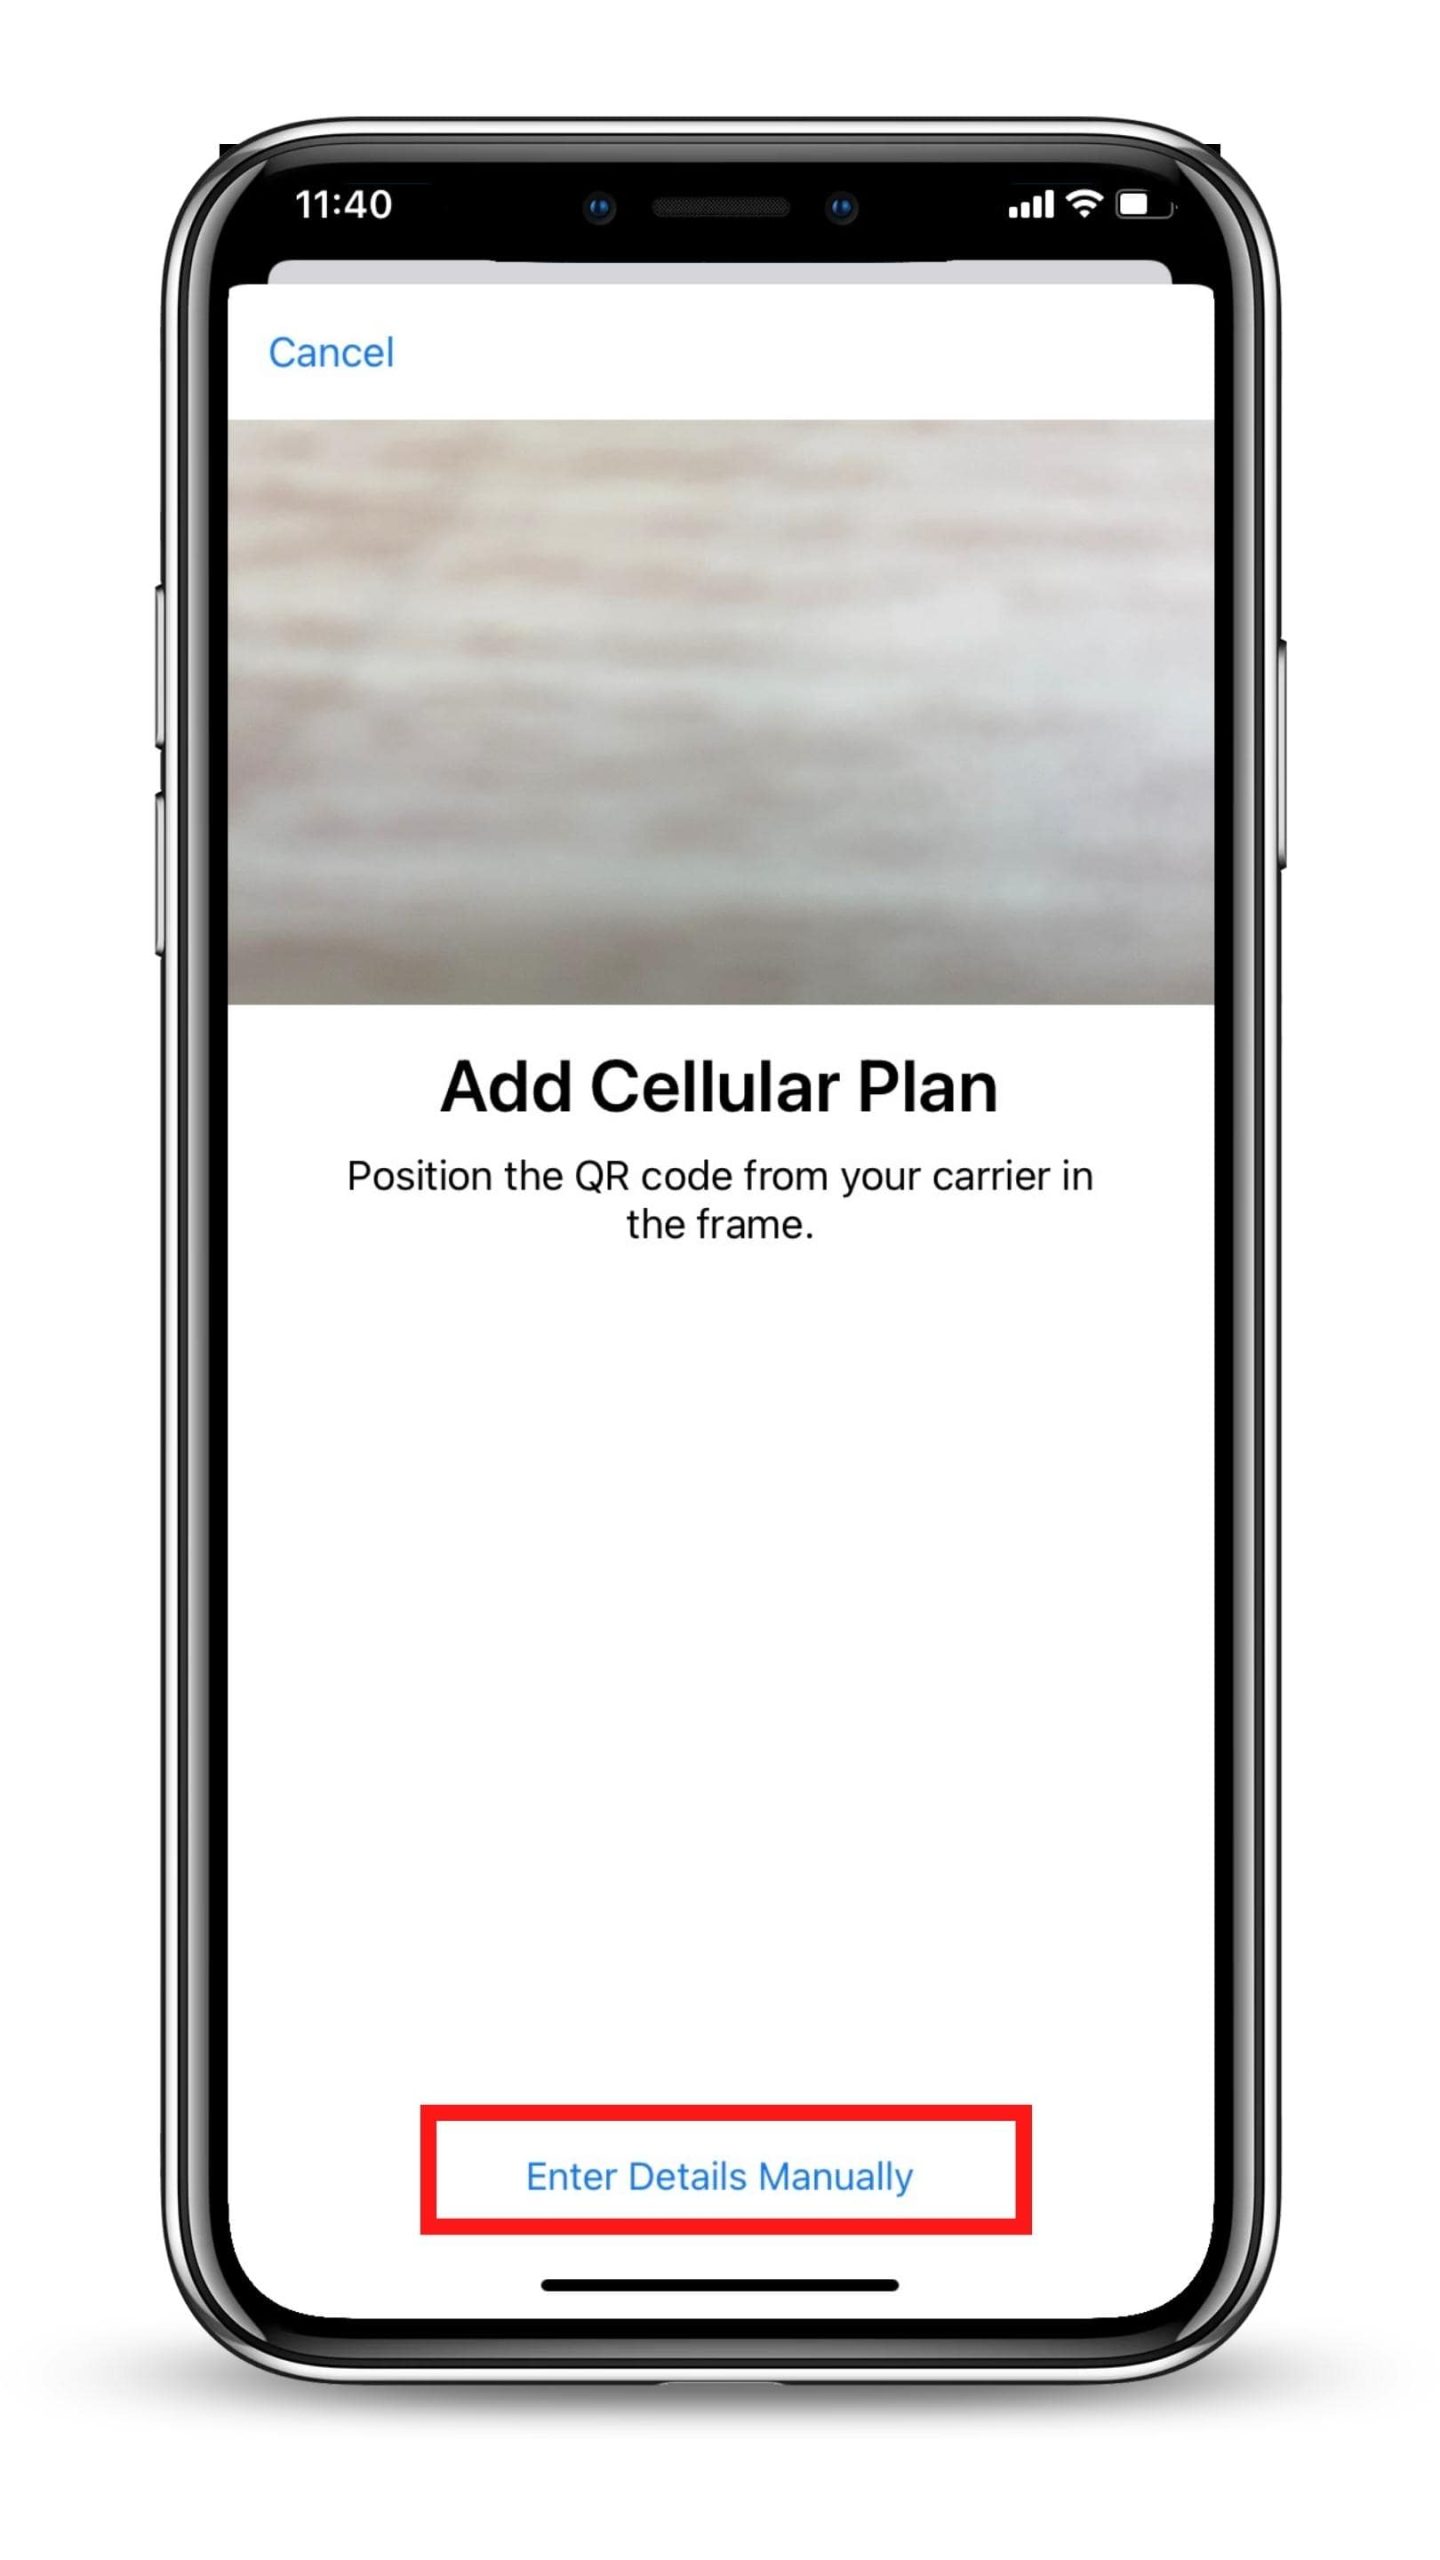
Open your camera and scan the code, or navigate to “Settings” > “Mobile Data” > “Add Data Plan” > “Scan QR code” > “Enter activation details manually”
Follow installation steps
Enter the SM-DP+ address and activation code to start the installation process. Use our guide below for step-by-step configuration.
Steps to install eSIM manually
- Step 1: On your iOS device, go to Settings > Cellular.
- Step 2: Select Add Data/Cellular Plan.
- Step 3: If you cannot scan the QR code sent by your eSIM provider due to a certain reason, you can still activate your eSIM manually by selecting Enter Details Manually.
- Step 4: Enter the required information including
- SM-DP+ Address
- Activation Code
- Confirmation Code (if required)
- Then, select Next.
- Step 5: On the screen named Cellular/Mobile Data Plan Labels, select the available label (like Secondary, Business, Travel,… ) or Label your eSIM profile as you want (i.e. China eSIM), and tap Continue.
- Step 6: Set your eSIM profile as the Default Line (if your data eSIM comes with a phone number) or select your Primary number if your data eSIM does not come with a phone number), then choose Continue.
- Step 7: Set your eSIM profile as the default Cellular Data > select Done. Switch off the Allow Cellular Data Switching to avoid roaming charges.
- Step 8: Turn on Data Roaming to start using your eSIM.
* Notes: Detailed guides for each eSIM plan will be sent in the email after purchasing.
Comment Utiliser l’eSIM Chine pour iPhone
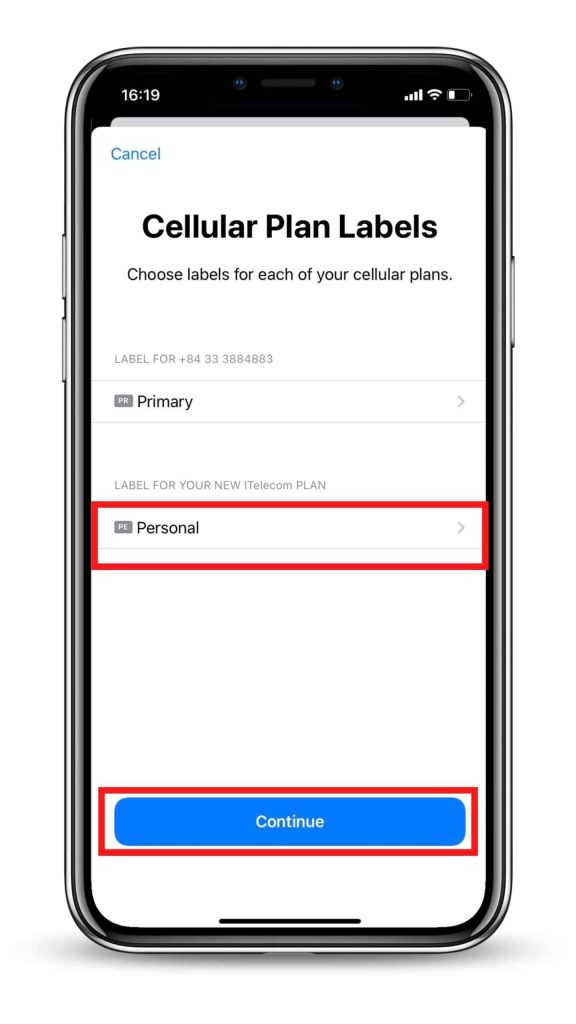
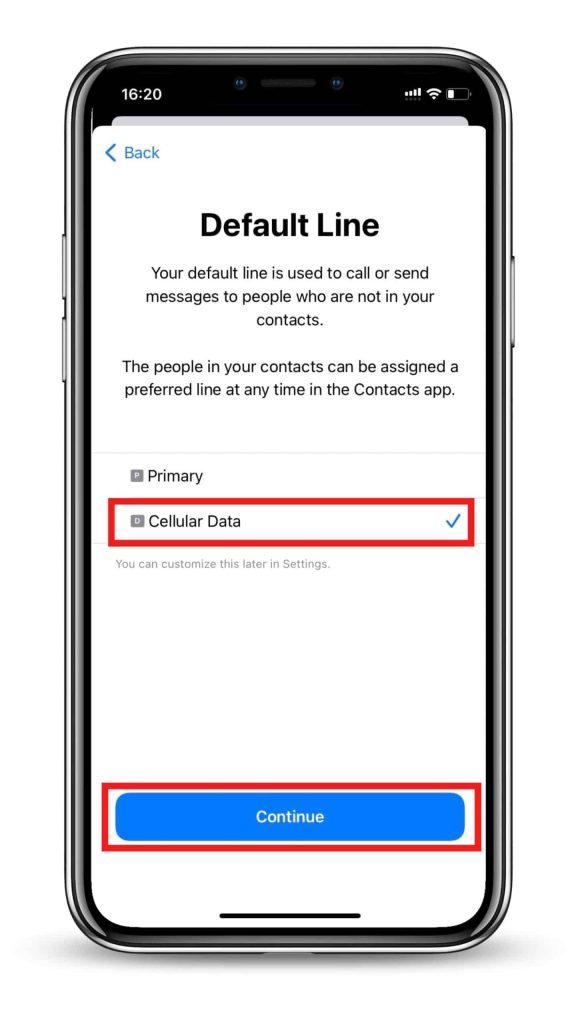
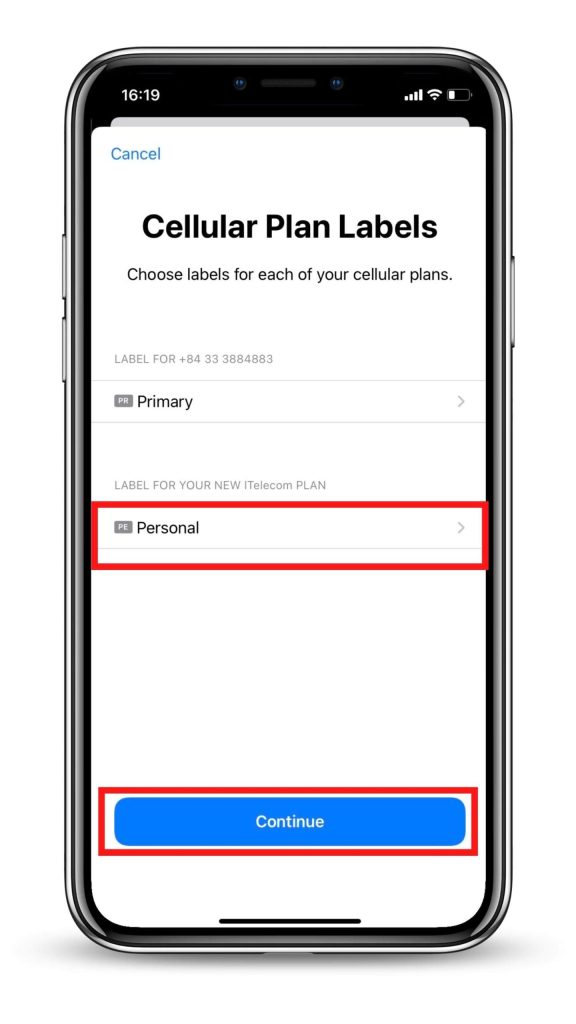
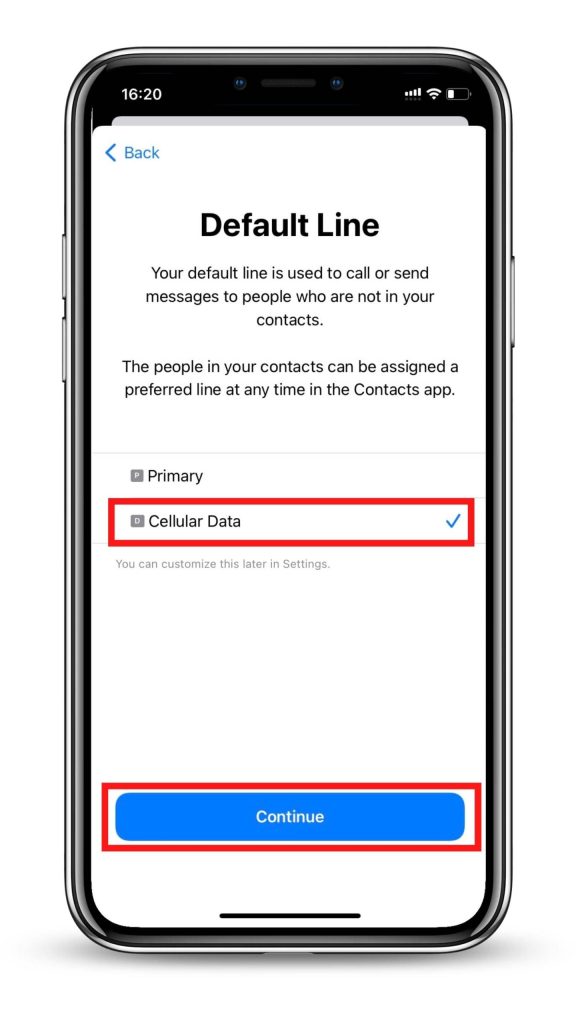
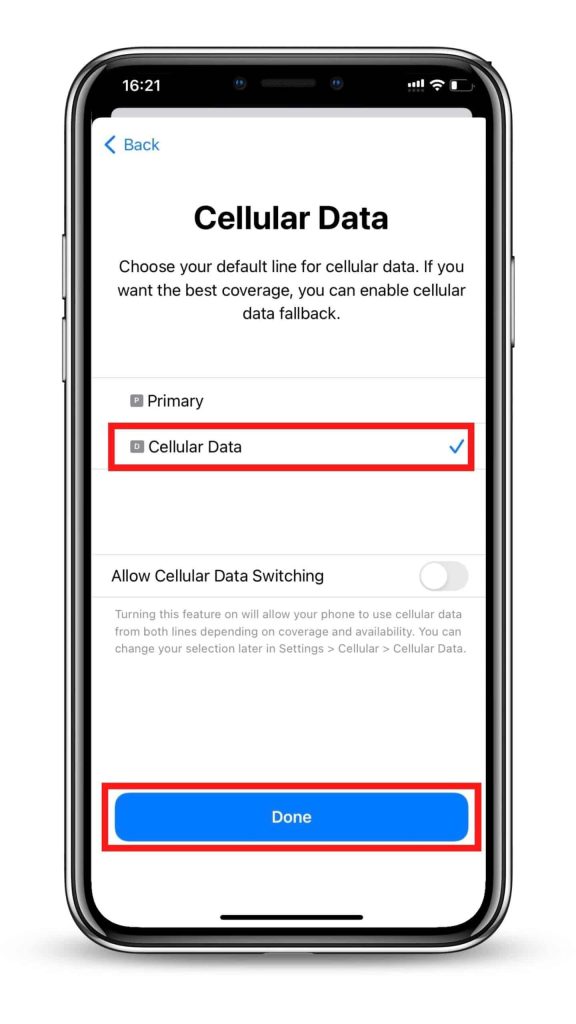
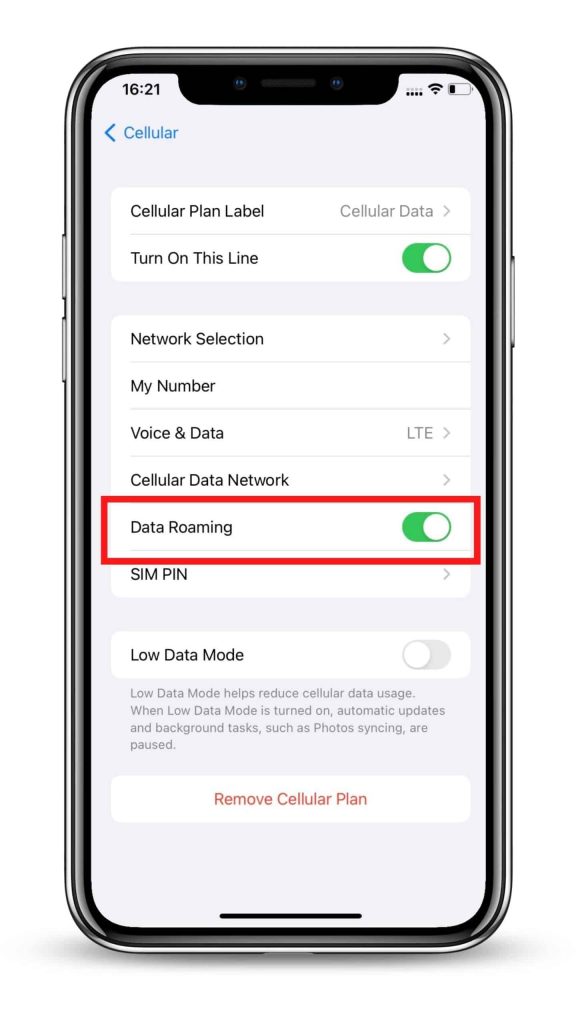
After installation, to turn on eSIM on iPhone when landing in China eSIM, you need:
- Step 1: Go to Settings, and tap Cellular/Mobile Data (depending on your device)
- Step 2: Choose your eSIM (under “Cellular Plans”) and switch on both the Turn On This Line (open Settings > Mobile/Cellular Data) and Data Roaming (open Settings > Mobile/Cellular Data > Mobile Data Options).
Congratulations! Your plan has now been installed and is ready to use.
Frequently asked questions
You might need to erase your eSIM if:
- You transferred the eSIM’s phone number to another iPhone.
- You’re going to sell, exchange, or donate your device.
Don’t erase your eSIM as a troubleshooting step, contact us if you need support when having problems with your eSIM.
If you erase your eSIM, you’ll need a new one. Then set up your new eSIM.
Now let’s check out how to remove an eSIM from your device:
- Step 1: Go to Settings > Cellular.
- Step 2: Select the plan you want to remove.
- Step 3: Select Remove Cellular Plan. Then, confirm your selection.
- Étape 1: Accédez aux paramètres
- Étape 2: Appuyez sur Données cellulaires ou mobiles (selon votre appareil)
- Étape 3: Sélectionnez votre eSIM qui a activé Activer cette ligne et l’itinérance des données
- Étape 4: Appuyez sur Réseau de données cellulaires ou Réseau de données mobiles (selon votre téléphone)
- Étape 5: Saisissez la valeur envoyée par votre fournisseur eSIM (c’est-à-dire ctm-mobile) dans tous les champs APN ( Données cellulaires/mobiles et Point d’accès personnel ) ou une valeur différente si vous utilisez l’eSIM d’un autre fournisseur. Les autres champs restent vides.
- Ouvrez Paramètres > Données cellulaires / Données mobiles (en fonction de votre téléphone).
- Choisissez l’eSIM que vous souhaitez utiliser (sous le champ “Forfaits cellulaires”).
- Appuyez sur Activer cette ligne.
You might need to erase your eSIM if:
- You transferred the eSIM’s phone number to another iPhone.
- You’re going to sell, exchange, or donate your device.
Don’t erase your eSIM as a troubleshooting step, contact China eSIM if you need support when having problems with your eSIM.
If you erase your eSIM, you’ll need a new one. Then set up your new eSIM.
Now let’s check out how to remove an eSIM from your device:
- Step 1: Go to Settings > Cellular.
- Step 2: Select the plan you want to remove.
- Step 3: Select Remove Cellular Plan. Then, confirm your selection.